Pages

Showing posts with label easy. Show all posts

Friday, January 28, 2011

Hodgepodge Quiche

Quiche is magical. The dish claims its origins from the French-German border and was originally a savory egg and cream pie. It starts with a few basic ingredients, a crust, eggs, a milk product, and cheese if you wish. Though, even these ingredients are not sacred. Quiches can be vegan omitting, eggs, milk and cheese for various plant based products (usually tofu). For me eggs, milk, some cheese and oil and flour to make a crust are ingredients almost ever present in my kitchen. This makes quiches a common occurrence in my house, especially in the summer. After you've figured out the and crust, what makes up the rest of the quiche is entirely up to you.

Dennis is suspicious of any quiche that does not contain a meat product, and doubly suspicious if a meatless Quiche also happens to contain spinach. Not that this stops me from experimenting. Some of my favorite combination are broccoli-cheddar, smoked salmon and mushroom, and ham or bacon plus mushrooms, onions and whatever vegetables happen to be in the freezer (often spinach) or vegetable drawer.

When I make Quiche, I usually combine a few different recipes and my own unique twists. How many ingredients you need for a quiche depends on the size of the pan your filling and how you prefer your custard/filling ratio. What I usually do is get the crust and filling together, and then pour the filling over until my pie plate can hold no more. If I end up with too much custard I have found that an extra dish of cooked eggs and milk is no hardship to eat as a lazy breakfast.

I've made quiche from recipes originating in many different cookbooks. But, I'm not sure I really got the idea of quiche, and how simple it is until reading the "Quiche Formula" in The New Enchanted Broccoli Forest. Mollie Katzen reduces Quiche to a crust (she gives 8 different crust options, the spinach crust being the reason the Dennis is suspicious of spinach quiche), the cheese, the filling (veggies), and the custard. The cookbook is worth having on the shelf for its vegetable pie and quiche section alone.

To make a Quiche:

1: A Crust (hint: you can go to your local grocery and skip making one by hand-- though the ones at the grocery are usually loaded with nasty hydrogenated fat)

Pie crusts are one of my prime nemeses. I'm not sure why. I think part of it is that my mother makes such perfect pie crusts that no matter how hard I try mine always seem inferior. That, and I can't seem to get them to stop sticking to the rolling pin (another arch enemy). They fall apart when I try to put them in the dish and always end up looking crumbly. That said, I have had a few zen pie crust experiences, where everything came together perfectly.

Most of the time I am just glad that quiche only have a crust on the bottom. Without a top crust to deal with I have figured out how to make a decent crust in the pie plate, without any rolling. As most of it is covered by quiche filling, if there happens to be any spots that break, or tear, or have to be patched up, well... no one knows but me, and I don't usually tell.

Recently, I have been experimenting with olive oil pie crusts, in an attempt to convince myself that pie crust can be healthy. I also make the spinach crust from Enchanted Broccoli Forest which I find goes well with Quiche (poll Dennis separately).

For a Spinach Crust (The New Enchanted Broccoli Forest, pg. 127)

2 Tbs butter or oil
3/4 lb fresh spinach
3/4 tsp. salt
3/4 cup flour
3/4 cup fine bread crumbs (or wheat germ)
A few dashes of nutmeg.

If using frozen spinach, unthaw drain excess water. Place in bowl add melted butter and the rest of ingredients and toss with a fork until combined. Press into a pie plate by pressing up the edges of the plate first and then into the bottom. This ensures that you have enough crust to go around the entire circumference of your pie plate, if the bottom is thinner it is not that big of a deal. If want flute the edges( a good explanation on how to do this in most basic Betty Crocker or Better Homes and Gardens Cookbooks) with fingers or a fork if you wish.

Fluting the edges of a pie crust was something that intimidated me for a long time, all you need to do is on your non-dominant hand press your index finger and your thumb together. Place these fingers next to the crust you want to flute (I usually place them on the inside of the pie plate). With your other hand take your index finger and from the opposite side of the crust press the crust into the slight V created by your other fingers. Repeat around the entire circumference of the pie plate.

If using fresh spinach. Mince the spinach and heat 2 Tbs. butter or oil in a large skillet. Add minced spinach and salt. Saute until spinach is limp. Remove from heat, add remaining ingredients and mix well. Press into plate and flute edges as above.

Fresh or frozen this crust should be baked for about 15 mins. in a 375 degree oven before filling. You do not need to let it cool before filling

If your interested in trying an olive oil crust. Place the below in a pie plate.

2/3 cup of extra virgin Olive Oil
2 1/2 cups of all purpose flour
1/2 tsp salt

Place pie plate in the freezer and move onto sauteing your veggies and getting your custard ready. When everything is ready to go, take the pie plate out of the freezer and with a fork, or a pastry blender mix the flour and the now thick olive oil together. When well mixed add 1/2 cup ice water and a dash of vinegar and mix. Press into the pie plate and flute edges as above. Adding more flour to your hands if necessary to prevent excessive sticking. I do not usually precook my crusts when I use olive oil. If you would like to preheat oven to 375, cover the edges of the crust with aluminum foil, and bake for 15 mins.

Now that your crust is made.
2: The Cheese

There are three ways to put cheese on and in quiche, all equally important. If you are adding cheese, first, you always want to add some to the crust first, before any of the veggies or custard. The cheese will help to create a barrier between the filling and the crust and prevent your crust from getting sticky. Second, many people like to grate a small amount of Parmesan or other cheese on top of everything to help with browning, though this is not essential. However, it is tasty, and improves presentation. Finally, if you really love cheese, add grated cheese (or cubed cream cheese) to your custard.

So for the cheese, you need about 1/3 lb. (more if you love cheese and less if your counting calories) of grated or finely cubed cheese. You can use any kind of cheese (even cream cheese), though Swiss, Gruyere, and Cheddar work quite well. Sprinkle most (or all) of this on the bottom of your crust. You can add any remaining cheese to your custard, or to the top of the Quiche before you bake.


3: The Filling:

You need about 3 1/2 cups of chopped meats and/or veggies for a 10 inch Quiche, or about 3 cups for a 9 inch quiche. On the quiche pictured I used a combination of onion, mushrooms, zucchini, and Goose The Market bacon (from Dennis' bacon of the month club).

1/3 cup bacon
1 cup diced onion
1 cup sliced shiitake mushrooms
2 cups zucchini

Always saute your onions and/or bacon(meat) with a tsp of oil over medium heat for at least 5 minutes. I try to get my onions to brown and caramelize slightly before making adding the rest of your veggies to the pan. Once onions and meat are cooked to your satisfaction add the rest of the veggies and continue to saute for 2 to 3 more minutes. The goal is to get the veggies partially cooked before baking the quiche. It also can work to steam the veggies before adding them to the quiche. Whatever veggies and meats you want to add will work. My favorite quiches almost always contain mushrooms and onions, though this is not a requirement. After 2 to 3 minutes take your veggies off the heat, and put them into the cheese filled crust.

Finally:
3. The custard

A custard for a quiche can be as light or as rich as you like it to be. The Fiddle Head Cookbook suggests about 2 cups of half and half and 4 eggs for a 10 inch pie plate. This is delicious, but for me it is a bit too rich. If you want rich mix:

2 cups half and half
4 eggs
a dash of cayenne
1/2 a cup of Parmesan (or other reserved cheese)
(add 1/2 to 1 tsp salt if not adding cheese, the cheese itself is salty)

(reduce this to 3 eggs and 1 1/2 cup of half and half if using a 9 inch pie crust.)

and pour over assembled quiche until the plate is full.

I prefer to use Mollie Katzen's suggestions for the quiche custard:
3 eggs
1 cup of milk (or yogurt/buttermilk)
(and any extra reserved cheese you want to add to the custard or 1/2 to 1 tsp salt)

Mix together and pour over the filling.

If you have extra custard put in a separate dish and bake with the quiche for about 10 minutes. It does make a decent breakfast.


If desired sprinkle extra cheese or grate Parmesan over the top of the assembled quiche to help with browning of the top.

Heat your oven to 375 and bake the quiche for 35 to 40 minutes.

Quiche is tasty hot and cold and good to eat for breakfast, lunch, or dinner. It keeps well in the fridge, and if you like it hot is fine when heated in the microwave. I like quiche as a dinner with soup and a salad (pictured with German Mushroom Soup and a green salad).

Quiche may seem complicated, but actually it does not take long to assemble (once you master the crust). Just remember, crust (always can be bought a store), cheese (optional), filling (assorted meat and veggies), custard(eggs and milk). That's all there is to quiche.

Wednesday, January 5, 2011

German Mushroom Soup

Soups become a staple of my kitchen as soon as the leaves start turning and the temperature drops. A couple of winters ago I decided to try to cook all of the soup recipes in the Fiddlehead Cookbook. The cookbook contains nine recipes for soup, and I have made six of them. Hopefully I will make the other three this winter. Every soup has been delicious and unique, and the reason I have not cooked though all of them is because these recipes demand to be made more than just once... and smoked halibut is hard to come by in Indianapolis.

One of my favorites is the German Mushroom Soup. I tried this recipe randomly a couple of years ago and it was the one that convinced me I needed to make all of the soups. I love mushrooms, and this soup excels at bringing out their savory, earthy, mushroominess. I am not aware of other broth based mushroom soup recipes. Though, to be fair, I have not looked for other recipes as I am quite happy with this one.

For German Mushroom Soup (The Fiddlehead Cookbook p. 22):


Heat 4 Tablespoons olive oil and or butter in a large soup pot over medium heat. The recipe calls for 2 Tablespoons of butter and 2 Tablespoons of safflower oil. I almost never have safflower oil on hand so I always substitute olive oil. I have tried both straight oil and with half butter. Butter and mushrooms do go together very well, but if you do not have butter, or are cooking a vegan meal then substitute olive oil.

Once the oil is hot add:

1 1/2 cups thinly sliced onion, cut stem to tip, not diced

Cook onion until transparent, string occasionally to prevent burning. This will take about five minutes. Once onion is cooked reduce heat to low.

Add 1/4 cup flour. And cook stirring for about 10 minutes until the flour and onions turn golden brown. The flour will help thicken the soup, and toasted flour also helps to impart on the broth a rich flavor. This is the method used to make roux in french and Cajun dishes.

Once your flour and onions are brown add:

1/2 teaspoon ground black pepper
1 dried bay leaf
2 1/2 cups vegetable stock (or use bullion or bullion paste)
1 14-ounce can diced tomatoes
1/2 teaspoon caraway seeds
1 1/3 cups dry red wine (I buy the little bottles of wine especially to cook with)
4 cups thinly sliced mushrooms (any type will work, but portobellos or crimini are especially tasty)
2 teaspoons soy or tamari sauce
2 teaspoons Worcestershire sauce (if making vegan or vegetarian make sure to use vegan Worcestershire sauce as the normal one contains anchovies, you can also make your own vegan Worcestershire sauce.)


Bring the soup to a boil then reduce heat to a simmer. Cook at a simmer, uncovered, for 30 minutes.

When soup has simmered dissolve 1 Tablespoon red or brown miso with 1/2 a cup of hot soup. Miso can be difficult to find and usually has to be purchased from an international or Asian grocer. It will usually be found next to the tofu in the refrigerated section. It is a salty fermented paste, usually made from soy and comes in many different varieties and flavors. Putting miso in a vegetarian soup is a great way to add a depth of flavor and savoriness that is most often associated with meat based broths. Originally, tamari sauce was a byproduct of miso production, though this is not the case of the sauce you commonly by in the grocery today. The recipes from the Fiddlehead make great use of miso, and making these recipes was my introduction to this versatile ingredient.

Once the miso is dissolved add the liquid and miso back to the soup pot and stir in. Taste the soup and add salt if necessary. Both the broth and the miso are salty, so additional salt may not be necessary. Serve at once and garnish with a dollop of sour cream if desired.

While delicious, this soup is too light to serve as a stand alone main course. Adding a 1/4 cup of barley or rice during the simmering process can help to make it more filling, though I dislike how this detracts from the flavor. I serve it for lunch or dinner with a couple of slices of bread on the side, or as a side accompaniment to salad, quiche, or grilled cheese sandwiches.

Thursday, December 30, 2010

Guacamole 1: "Best Guacamole You Will Ever Have"

We have at least three different ways of making Guacamole. We were first exposed to this particular Guacamole when attending a tequila tasting dinner hosted by Kahn's, a local adult beverage superstore. The Guacamole had rich and complex flavor and was completely green and silky smooth. It was missing the common addition of chunks of tomato. The taste was limey but we were assured that it came from tomatillos, not citrus. The key to the flavor apparently was to roast all of the peppers and tomatillos before adding them to the avocado.

We filed this fact away for future reference agreeing to try it the next time we had a craving for guacamole (which is quite frequently). However, before we had the chance to try our own version, I stumbled across the recipe from the mouth of the chef himself, in our local newspaper. You see, someone else at the dinner had loved the guacamole, gotten the recipe, and sent it into the newspaper. And there it was printed, a blurb about the chef, and the dinner, and a recipe titled 'Best Guacamole You Will Ever Have'.

We have made this version of Guacamole several times. It is the most complicated version we make, but also amazingly delicious. I won't say it is the 'Best Guacamole You Will Ever Have' because I have learned which Guacamole is preferred is very mood dependent. This Guacamole does have the benefit of keeping very well, better than those that use lime or salsa to help keep the avocado fresh. It does not go off color, get a funny texture, or lose the freshness of its flavor when made in advance. Which, if your making dip for a party, or a Tequila tasting dinner, is a huge advantage.

Best Guacamole You Will Ever Have

4 tomatillos, peeled and washed
2 peeled cloves of garlic (or more!)
3 to 5 Serrano peppers
2 tablespoons water
3 avacados
1 onion, diced
1 cup cilantro, chopped
~2 Tablespoons water
Salt and Pepper to taste


I have written about tomatillos before, but I have recently discovered these very versatile and very tasty tomato relatives. You can find them in most produce sections next to the tomatoes and avocados. They come with a husk on them that needs to be removed. They will be sticky but a wash in some warm water and a little bit of dish soap will help. They have a light citrus flavor and can help to thicken up sauces.

For the peppers, I do not always use serranos. They are good but can be difficult to find, at least in Indianapolis. A combination of fresh jalapenos and pablanos also works well. Adjust the number of peppers to how spicy you want your dish. I have added dried cayenne peppers to give it a little extra kick.

Take your tomatillos, choice of peppers, and peeled garlics and place them in a pan. Put your oven on broil and the oven rack in the top third of the oven. Put your pan in the oven and keep an eye on it. The skins of the vegetables will start to turn brown, dry out, and finally blacken. Rotate the vegetables with tongs and try to get all sides roasted and blackened.

Once the veggies are roasted place them all in a food processor or blender and add about 2 tablespoons of water (you may need more if using a blender). Blend or process until combined. I like mine smooth, but if you prefer more pepper chunks then blend accordingly.

Dice your onion and cilantro. The cilantro can be to taste. I think 1 cup is spot on, but if really like, or do not like cilantro then increase or decrease as desired.

De-pit avocados and spoon out flesh into a bowl. Add the blended or processed mixture to the bowl and use a fork to combine. Mash the pieces of avocado with the tines of the fork and mix until smooth. Mix in the onion and cilantro and season with salt and pepper. Adding enough salt is critical to drawing out all of the complex flavors in the dish, so do not be too shy. Usually I add around 2 teaspoons of salt to this dish.

This guacamole can be served immediately, or refrigerated. It may seem somewhat runny if served immediately. However, there is a pectin like substance in tomatillos that will thicken it up if it is allowed to sit and chill for a bit.

At some point I will write about the other guacamole variations that commonly make appearances in my kitchen. This one is great for parties. As we eat guacamole for a quick no cook dinner this recipe does not get made as often as other options. However, it is delicious and worthy of the title of the "Best Guacamole You Will Ever Have".

Monday, October 18, 2010

A Meal All Grilled


Grilling is something we absolutely love to do. We have a huge charcoal grill with Cast Iron grill surfaces that we got a few years back on an extra special 'Get this out of our store now!' sale at the end of the summer. Dennis and I always have a head to head about the terms 'Grilling' and 'Barbecuing' to him barbecue is a slow cooking process utilizing sauce. To me, who grew up on the west coast, a Grill is a Barbecue and the two terms are interchangeable.

One problem with grilling is that it always seems like such a waste of energy when you heat up all of your charcoal, merely to grill some steaks, or burgers or kebabs. Usually there is plenty of heat left over to grill your sides and even your desert as well. In the summer this will keeps the kitchen cool since you're not cooking anything inside.

For this meal we had:
1 12 oz. Rib Eye, split in two --Bargain shopper that I am I found a very nice natural beef Rib Eye on special

We coated the steak with olive oil and sprinkled it with salt and pepper. Keeping it simple is in my opinion the key to a good grilled steak.

We sliced a fennel bulb, zucchini, and yellow squash and tossed with about one tablespoon of olive oil and one tablespoon of balsamic vinegar, and sprinkled with salt. We have one of those vegetable grill pans that has holes in the middle, and it works fantastically for grilled veggies.

Once the charcoal was ready and the grill was hot (ours has a thermometer on it and we usually let it get to about 400 degrees before grilling) we put the vegetables out. In this case, they are going to take longer than the steaks. Leave the veggies to sit for about 20 minutes and then put the steak on directly over the coals. Use direct, not indirect heat. You will want to get a nice sear. In order to do so, do not move the steak other than flipping it over; which should only be done once. Close the grill and after 4 to 5 minutes (depending on the thickness of your steak, the heat of the grill, and how rare you want your meat) flip the steak and cook for another 3 to 4 minutes on the other side.

To check for doneness you can use a meat thermometer (Med. Rare is 130 degrees in the middle) or you can poke the steak with your finger or tongs. The more done it is the less give it will have. To get a feel for it just remember what the steak felt like when raw. Well done will be quite stiff, Med. Rare will still be soft, but not squishy. If you under cook your steak you can always put it back on, but you cannot undo an over done steak.

Once the steak is done, place it on a plate, loosely cover with aluminum foil, and let it sit for at least five minutes before eating. The reason for letting the meat sit rather than eating immediately is to let the edges of the meat to solidify and hold the juices in. Depending upon the thickness of your steaks, this could take longer or shorter. However, the same logic can be applied towards any non-ground grilled meat. A trick to improve this resting period is to place a smaller plate upside down on a larger plate and put the steaks on top of that. This allows the juices that drip out run away from the steaks. This helps the crust form quicker as well as preventing the steaks from sitting in their own juices, which saps more juice out of the steaks. As with the resting process, this can be applied towards other grilled meats as well.

The veggies should be getting close to done by the time the steak is ready. So you are almost ready to eat. I miss-lead a bit in the title, because I did sauté some mushrooms and add a bit of wine and cream to them and we poured them over the steak. Just chop up your mushrooms (usually 8 oz.), heat some butter or olive oil in a pan until hot, sauté the mushrooms and sprinkle with garlic powder, salt, and pepper. When they are soft and have lost some of their mushroom juices add 1/2 cup wine and bring to a boil. Then slowly add in 1/4 cup cream and simmer until the sauce thickens. This is delicious over steaks.

The simple meal of grilled steaks and veggies with the mushroom sauce was delicious. Afterward, we followed it up with a grilled desert. This is something that Dennis has done several times and is a great way to use peaches if you have bought a few too many of them and are getting a bit sick of just eating them. The original recipe for these is from epicurious.com and can be found here: Grilled Brown-Sugar Peaches with White Chocolate. I have made it with white chocolate, and while it is good I have a grudge against white chocolate because it pretends that it is chocolate when it is not. Our modification uses real dark chocolate.

Our recipe modification:

2 peaches cut in half

Mix 2 tablespoons melted butter with 1 tablespoon brown sugar and a dash of cinnamon. Add the peach halves and toss to coat them in mixture.

Place the peaches on the grill flat side down for about one minute, until they heat up and start to brown.

Flip the peaches and fill with:

2 Tablespoons (or more) finely chopped dark chocolate
Any extra sugar mixture

Grill until the chocolate starts to melt. (About 1 minute)


Eat as is, or serve with ice cream, whipping cream, chocolate sauce or other toppings. The last time we made this I got a little crazy with the desert and served with ice cream, chocolate sauce, and fresh blackberries. It was a bit over the top, but delicious.

Sunday, September 26, 2010

Crepes au chocolat

One of the things that always impresses me most about France is the crepe stands.

Wandering the streets? Doing some sight seeing? Hungry? It doesn't seem to matter where you are, there is someone close by selling crepes out of a traveling food cart or little hole-in-the-wall cafe. You can get them filled with anything you want. Formage? Oeufs? Nutella? Chocolat? You name it, they have it; and,while savory crepes are a nice treat, my favorite has always been crepes au chocolat.

The reason I always found the crepe stands so impressive is that it seems like such a mysterious process to make a crepe. From an American perspective they are a foreign dish, and not just foreign but French. Thus must be very difficult to cook. And something so clearly complex is not what you would expect to be vended out of a street cart. The secret is that most classic french dishes are painfully easy to make, and crepes au chocolate are only a few minutes and a hot pan away.

From: The 1000 Best Recipes (a cook book Dennis bought before I knew him and still comes in quite handy)

For the sauce:

1/4 cup butter
3 Tablespoons cocoa powder
1 cup brown sugar

Put in pan on medium heat and mix until butter is melted and ingredients are combined. Add slowly-

1 1/4 cup whipping cream (you could use milk, but if you do add some plain or vanilla yogurt for thickness)

Stir the mixture until it comes to a boil. You now have a delicious sauce that is great on crepes or ice cream, or anything else you might need a homemade chocolate sauce for. Keep the sauce warm while you make the crepes.

For the crepes:

This crepe recipe can be made and served with anything, if your doing desert crepes (like this recipe) you can add a teaspoon of sugar--though it's not called for in the recipe. You can fill them with jam (we had the leftovers with jam for breakfast) or sprinkle them with sugar. Or if you want savory crepes you can add a bit of salt, and some chopped herbs to the batter and serve the crepes with cheese, roasted veggie, chicken, or mushroom filling. The possibilities for crepes are endless. I read somewhere recently that almost every culture has a pancake (meaning a flat bread cooked on a stove or open fire that you put toppings on or in). The Mexican version is tortilla, and like tortilla, crepes can be filled with just about anything.

Combine:
3 eggs
1 cup milk
3/4 cup water

Once this is relatively well mixed (it does not have to be uniform, its alright if there are still some eggy bits) then put 2 cups of flour in a separate bowl and hollow out a hole or well in the middle. Pour your egg mixture into the well and then gradually stir with a spoon or whisk. This is the trickiest part of crepes, you want to get the ingredients combined without beating too much as beating develops the gluten in the flour. This is good for bread, but bad for crepes. Your crepes will still taste good if this happens, they will just be chewier.

Once your batter is smooth carefully stir in 1/4 cup of melted butter.

Heat up an 8 inch non stick skillet or crepe pan and grease it lightly with butter. When the pan is hot (to check flick a drop of water on the pan, if it sizzles, its hot) pour 1/4 cup of crepe batter into the pan. Pick the pan up and swirl the mixture around to coat the surface evenly like you would an omelet. You should be cooking the crepes on medium low to medium heat, depending on your stove. When the edges of the crepes start to curl up and the surface no longer looks wet then take a large spatula and carefully work it under to flip the crepe. They are very thin so it is necessary to be gentle with them. Cook the crepe on the other side just briefly (usually about 45 seconds) until browned. When done place it on a plate, you can stack the crepes up as you cook, but place a piece of wax paper or plastic wrap between them to keep them from sticking to each other.

When done take a crepe, spread some chocolate sauce on it, fold the crepe it into quarters, and pour, per the recipe, 'a generous amount' of chocolate sauce on top. You can sprinkle with powdered sugar, add whipped cream, or a scoop of ice cream to the top. Eat. Enjoy.

In case your still skeptical and think that crepes are difficult I'll have you know that this last time, when these pictures were taken I did not actually make the crepes au chocolat. Dennis did. And its not that he is incompetent in the kitchen--far from it. But he is slightly traumatized by anything that looks like a pancake (he had too eat too many of them as a kid) and much more comfortable grilling or cooking in the manly realms of meat. Now, he had just watched Alton Brown's Good Eats episode 'Crepe Expectations', but one night when I asked him to make desert, he pulled out one of his old cookbooks, found this recipe, and made delicious crepes au chocolate.

Sunday, September 19, 2010

Refried beans


I am a sucker for deals. And in shopping it seems I often pick up big bags of dried beans as they are always a good deal. However, the question sometimes becomes, what do you then do with all those beans? Usually I end up making a soup, a chili, or a lot of bean dip, but this time I wanted to do refried beans, as we were having Carnitas.

However, I had never done refried beans before and for some reason had the perception that they were difficult. I think this goes back to when I was a little kid and my older sister was going through a cooking Mexican food stage and made them from scratch. Refried beans from scratch wasn't even something my mom did and it seemed like quite the impressive feat. Especially after she followed up homemade refried beans with homemade sopaipilla. It was all very mysterious and delicious, and clearly must be difficult or else more people would do it.

The internet revealed that 'refried' is a mistranslation and 'refritos' actually means well fried. This fact relieved some new recipe anxiety as from the title one might assume you have to fry the beans and then fry them again. And that sounds like a pain.

To make refried beans, start with dried beans (or if you prefer, grab a can of beans a skip down a few steps). I usually use the whole bag, what ever size it is. This time I think I had 2lbs of beans. What you don't use to make refried beans you can bag up and freeze, and then you don't have to go through the soaking and cooking process next time you want beans.

Beans need to be soaked for at least 6 hours, and I prefer to do a cold water soak. To speed up the process you can boil your beans in some water, then turn it off and let them sit for 1 to 2 hours. Drain them, add more water and cook. However, your still waiting 1 to 2 hours for the beans to be done. To me it makes the most sense to either start soaking the night before if your planning on boiling them the next day, or if your planning on cooking them at night, start the soak in the morning. For the refried beans I used pinto beans which is what you get at a Mexican restaurant, though you could use any type of bean you like.

First, rinse you beans, look for any pebbles or dirt, or things that are not supposed to be in there and take them, and any beans that are shriveled up, out.

Put your rinsed beans in a bowl or pot and cover with water several inches over the beans. The beans will expand as they soak. Apparently the fresher your beans are the less time they will need to soak, but the age of the bean is not easy to tell from a bag of dried beans.

Leave your beans to soak for 6 or more hours (if you have less time to soak you will just have to boil longer). Do not soak for too long as apparently the beans can ferment, though I have never had this happen.

Drain the soaking water off of the beans and put the beans in a big pot, cover well with water--at least 3 times as much water as beans and you cannot have too much water. Bring the pot of water to a boil to cook beans. Cover and keep the pot at a low boil for an hour. Depending on the type and age of the beans it could take more time. After an hour, sample a bean, if it is still too firm boil longer and sample again. When the beans are cooked to your satisfaction, drain them. This process can be sped up to mere minutes if you have a pressure cooker.

For the refried beans:

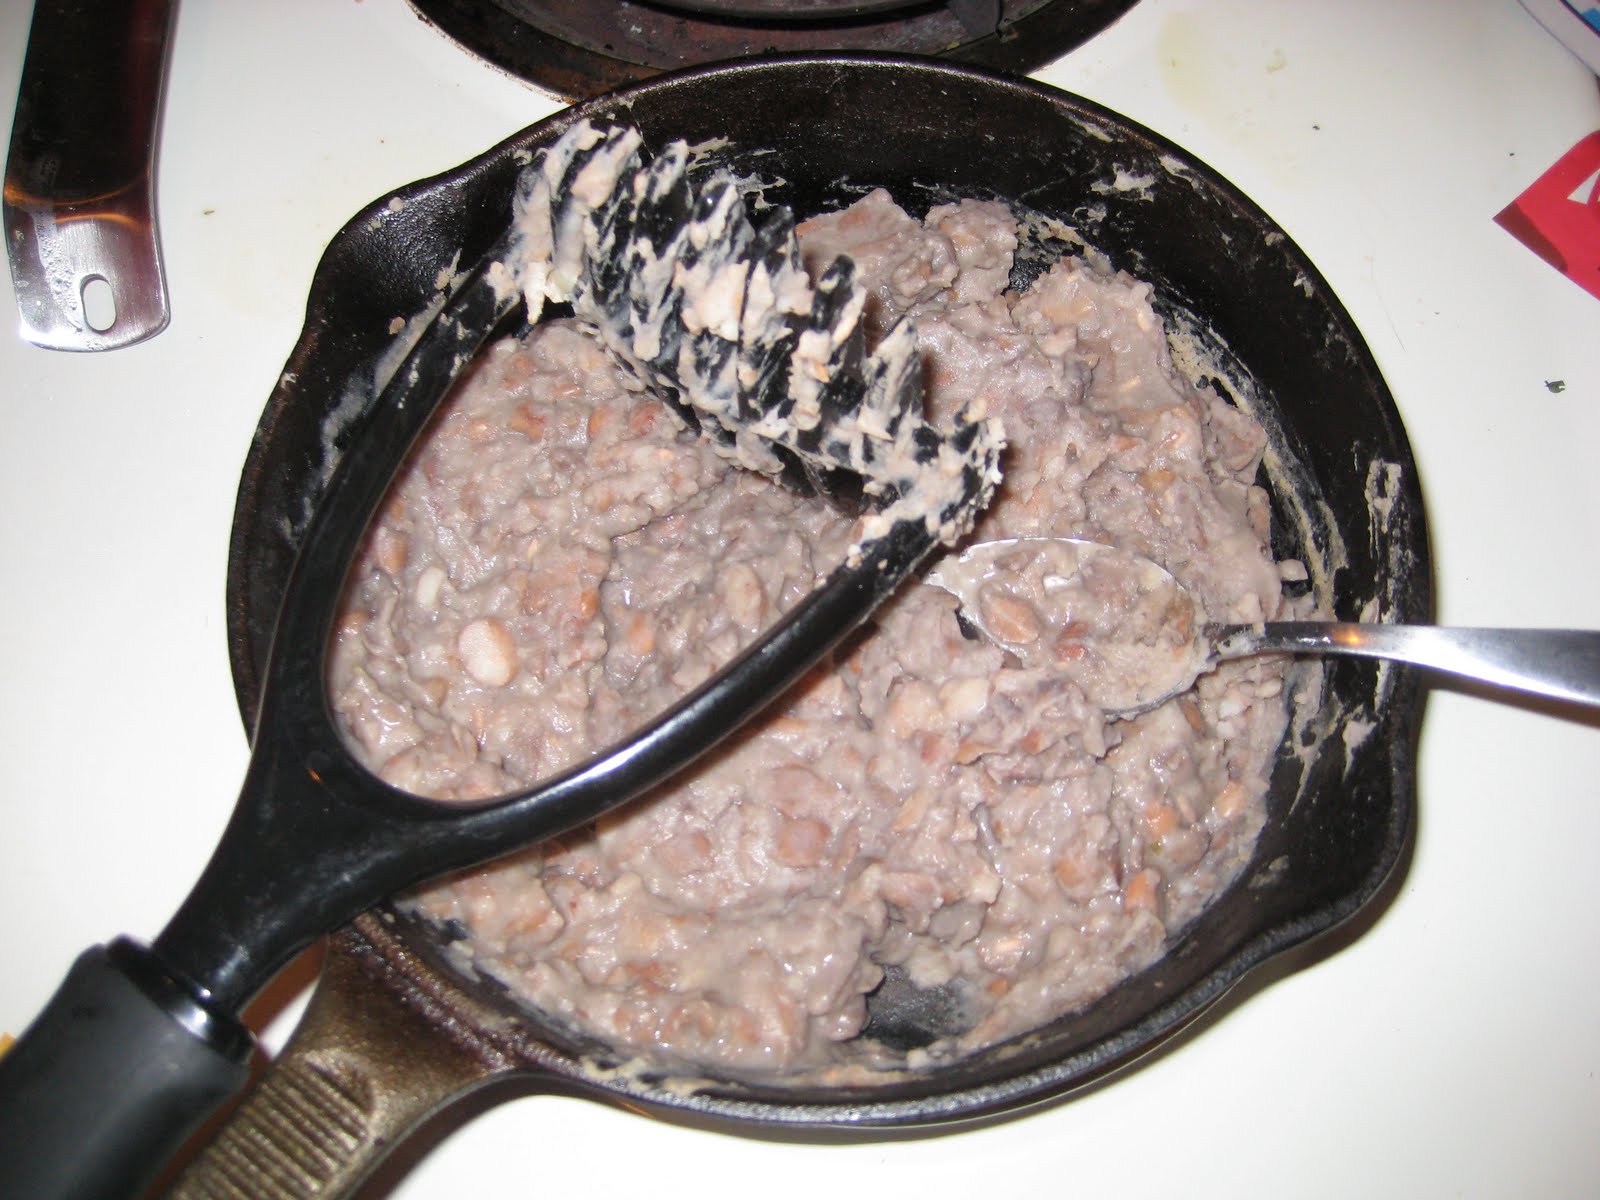
Get a skillet out, add 1 T fat (oil or bacon grease-- we used bacon grease and it was delicious) and heat the skillet up. Add 1/4 cup minced onion if you like, I skipped this and 2 cups cooked beans (or if you bought a can of beans, drain and rinse them and throw them in the skillet). Get a potato masher, fork or spook out, and mash the beans as they fry in the skillet, when they are well mashed add water or broth (about 1/4 cup) and keep mashing until they are hot and the right consistency. Add salt to taste (about 1/2 teaspoon in my case). And there you have refried beans. If you have the cooked beans on hand this takes about 5 minutes.


Put any extra beans in freezer bags or storage containers and freeze. I just used the extras from when I did refried beans to make a tasty soup and it was nice not to have to soak the beans to make it. I do think beans taste better when you start with dried.

The recipe I modified for this can be found here. I quite enjoyed the refried beans and will absolutely do them again. They were much better than the ones out of the can. Though, that might have been the bacon grease.